because it didn’t involve any plaster or
papier mache.
Bear with me, my pictures and the
process in building “FREEDOM!”
Ingredients:
1. 1 pc.1:87 Cararama VW Kombi Pickup
2. 1 pc1:72 REAL-X Lancer Evolution VIII
3. 2 23 cm x 12 cm white cardboards
4. Mr. Hobby Acrylic Paints( red,yellow,black & white)
5. #1,#2 and #5 Flat Paint Brushes, 1 of each
6. 1 Tumblers
7. 1 Rubber Cutting Mat
8. Elmer’s Glue and Super Glue Gel
9. Pen and Paper
10. Steel Ruler
11. Cutter
12. X-Acto Knife
13. Water
14. A pair of Scissors
15. fine Ballast sand for hobbyists
16. Some Horses
I am not comfortable with the roads being parallel
to the base of the diorama, that’s why I often, if not
always, draw the road at an angle.
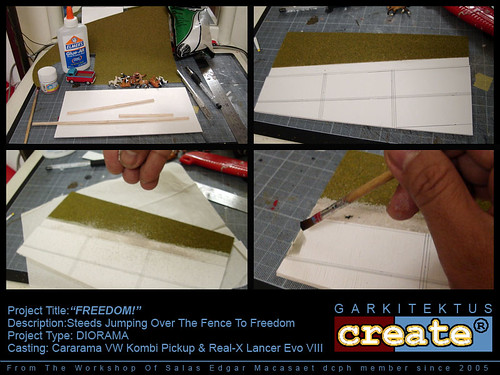
The 2-way country road is 5.5 meters in width (approx. 7 cms from
your steel ruler in1:72-87 scale)
I intended to place 2 cars passing by
a wood fenced field full of horses.

The dirt sidewalk 1.2 meters wide ( around 1.5 cms form
your ruler.
Get your pen and start sketching the road, the sidewalk and the field
Cut out the road which is elevated from the natural grade line.
It is very important not to miss small details in building
a diorama because this will add to the realism of your work.
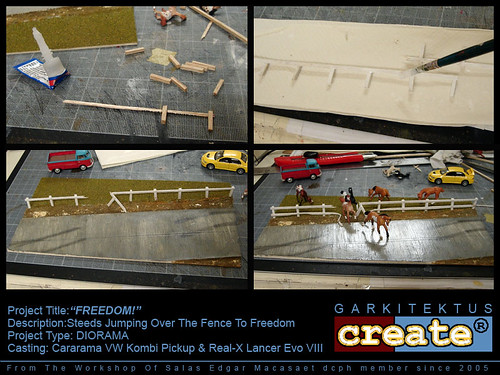
For the wooden fence, cut approximately 2 mm of the
balsa wood used in a previous diorama.
Note: do not throw away cut out pieces as you may be
able to use these in future construction.
Get a partitioned plastic container for these bits and pieces
of “rubbish”.
Mix yellow white and black and you’ll get the color for the
road. Apply this color using lots of water for that
washed look.
For the road, use your x-acto knife to cut grooves for the
“concrete” segments and pacing tile pattern.
This will be very realistic when painted
as the paint will seep in.
Remember to scour the carboard with your knife several
lines. This is for the “walis tingting” effect used in concrete roads
to prevent a slippery surface during rainfall.
Use considerable amount of water in applying the grayish green color
of concrete.
In the photos the concrete seemed to glimmer,
it is because I sprayed a thin layer of clear coat. This is to protect
your base and let the materials settle better.
And it added the effect of a slippery road hence the screech marks
caused by the sudden application of the brakes of both cars
to avoid hitting the “liberated” horses.
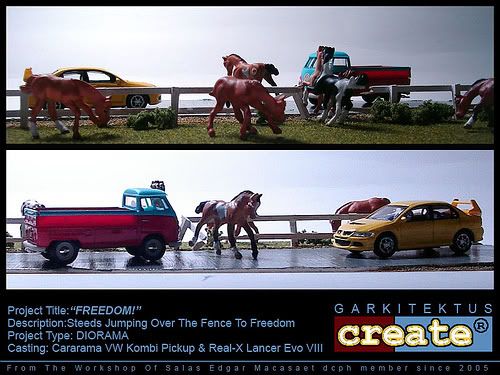
Then you will have something like this.

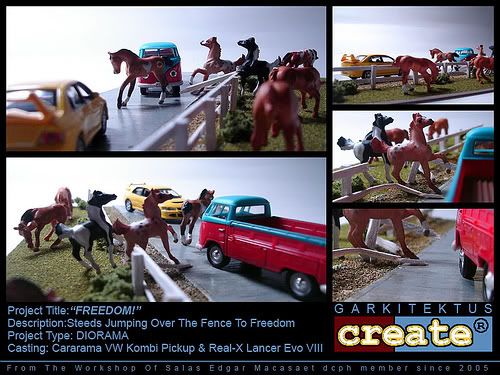
After all of the above, the tedious task of photography is next.
It is advisable to do the pictorial under a bright sun but i
don’t have the luxury of time to do that.


Again, it is most enjoyable building these scenes and I hope you may venture into it.
It is most relaxing indeed.
Thanks for the interest. :-)
No comments:
Post a Comment